


Introduction
About a year and a half ago, I took the leap and left my full time gig working for Shopify to pursue my art full time. One of the most valuable skills that I have brought with me into this new career as a creative entrepreneur is resourcefulness. When it came to thinking about offering frames for my customers, it was an area of the business that was far too overwhelming. With all of the different sizes and types of products I carry, combined with the confusion of shipping, and then the insane prices for professional framing, I decided that I would just offer my products without frames and let my customers choose on their own. That is until I was accepted into my first gallery show. I had a few paintings that had been accepted into the show, and I knew that I wanted them to look professional, and I decided that I would try creating some wooden frames that matched with the West Coast, Nature aesthetic that are found in my paintings, and that's where my journey of building custom frames began.
I love my work as an artist, but every once in a while it is nice to switch up my tasks, and wood working has always been another love of mine. Over the last couple years I have built out a Mobile Studio, picking up a 2016 Ram Promaster and converting it to a liveable, workable space that I love spending time in. I mention this because in the process of taking on that project, I have accumulated a good collection of tools that have allowed me to build out my frames somewhat more efficiently than when I began.
So let's dive in. First off, I just want to provide a couple of disclaimers around how I build out my frames and what I recommend for others interested in building for themselves. For one, I am by no means a professional carpenter, and while there are many other ways out there to build a frame, this is the process that I have developed and works best for me (i'm open to helpful suggestions though, so please feel free to leave me a comment below!) Secondly, if you do not feel comfortable, or haven't used power tools before, please seek the guidance of a professional or send me a message here if you would like me to build you a custom frame. Building frames may not be for everyone, but for the artists, or fine art collectors out there who want to do it themselves, or can't find the type of frame they are looking for locally, I hope this tutorial can help you create your own professional fine art floating canvas frames.

Step 1: Supplies
Please note, Frames can be built without power tools like a miter saw and a table saw, it just speeds up the process and makes much more accurate results. If you do not have a miter saw you can pick up a miter box and hand saw like this one here for $15 from Amazon. If you do not have a table saw, you wont be able to make the floating part of the frame you see in my frames, but you can still make canvas frames without the float like some of my older frames seen here.
Here is my Supply List:
- Table Saw
- Miter Saw with angle Adjustments
- Electric Palm Sander
- Sand Paper (120 grit, 320 grit)
- Carpenters Wood Glue
- Scotch Tape
- Finishing Nails
- Hammer & Small Nose Tap Tool
- Wood Fill
- Wood Conditioner
- Wood Stain
- Ratchet Strap
- Clamps (min. of 3 depending on size)
- Wood For Frame
- Measuring Tape
- Pencil
- Right Angle
- Last but not least, Your Art!
Choose Your Wood & Calculate

For my frames, I had 1.5 Inch Deep Canvases from Opus Art Supplies, so I choose to go with 1" x 3" inch pieces of Spruce from the Local Lumber Store. I treated, sanded and stained the Spruce and they turned out great, all at a great price. Other woods can also most certainly be used for your projects. Hardwoods are more expensive but are of higher quality and will be more durable than soft woods, but come at a higher price tag. If your canvases are thinner, you can choose a thinner 1" x 2" for the frame if you wish, you will just need to adjust the measurements to the painting sits flush at the face of the frame.
For the amount of wood needed, you will need to do a little bit of math. For my example I will use the one 16" x 20" deep Canvas. So each side length of the frame needs to equal the size of the canvas, plus 3/4" (width of the 1" x 3"), therefore for each length we will add 1 1/2 inches for our supplies. For my frame design there are two components, The external frame (that you see from the front and side of the frame) and then the backing frame, which the canvas lays against and is screwed into, that backing frame does not need the 1 1/2 extension as it sits inside the outside frame. If you are confused, feel free to scroll down to see the design in the photos.
For one 16 x 20 frame you will need:
- 17(1/2) x 2 = 35
- 21(1/2) x 2 = 43
- 16 x 2 = 32
- 20 x 2 = 40
Total = 153" or 12.75 Feet.
So I will pickup two 8 foot pieces of 1" x 3" Spruce. It is also a good idea to have some extra in case of any mishaps.
Step 2: Measurements for the Floating Rip Cut
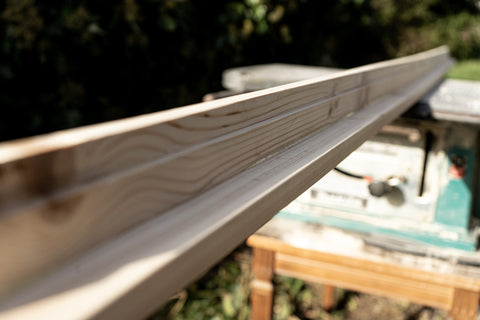
First thing you want to do is make a sketch of the frame and add measurements to the sketch so you can keep track of everything. The first cut we will do is the rip cut with the table saw, that creates the float gap between the canvas and the frame. We will cut this whole piece in one go at the beginning. You will want to measure on the wood for your cuts as follows. I wanted a 3/4 deep cut into the frame 1/4 in from the face. You can see in the second image below, I marked 1/4 on the face and then 3/4 on the wider side. We will essentially be cutting a small rectangle out of one of the corners of the wood. Keep in mind the side that is not being cut out, will be the side of the frame that you see, so choose the nicer side out.


Next you want to set up your saw for the cuts. We will have two stages for setting the table saw. The first stage will be setting the saw blade to 3/4 deep, and then set your fence 1/4 away from the blade. Once you have that all locked in you will feed the piece through like below.

The cut should look like this when you are done.

Next up you will make the second cut, which will be the 1/4 deep cut, at 3/4 inches into the wood. Make sure you cut with the previous cut closest to the table as seen below.

If measurements were all good, and wood was lined up properly (and your pieces were not bent) you should have a nice cut out like this! Sometimes when I do a poor cut or the wood is slightly bent, the cut wont come out perfectly and I have to go back in with a chisel and sandpaper and clean it up, but it is usually fine!

Step 3: Attach the Inner Frame
One of the biggest things that helped me with accurately and consistently building the frames well, was to assemble the inner frame and the front of the frame at the beginning, then make my miter cuts. Instead of trying to line up double the amount of miter cuts down the line. So next up, grab your clamps and the other piece of 1" x 3", your glue and clamp them together as follows:

You can also see that I did a rip cut for the inner frame, splitting that piece in two. This is optional. Keeping the full 1 x 3 will be stronger, but in my experience 1 1/2 wide for the inner frame was good enough and I had more frames to make and not enough wood so I split that piece in two. By the way, for this 8 foot length I had 6 clamps to form a solid contact.

Step 4: Make Corner Cuts
Once the glue has fully dried, we can measure and make our miter cuts for the lengths of the frame sides. For my 16" x 20" frame I like to start on the bigger side of the cuts, as once you go too small theres no getting that back. So first up, I set the miter saw to 45 degrees.

In the image below. You will see a miter cut through the frame. You will notice that the piece on the top is ready for joining, however the piece below, its angle is 45 degrees in the wrong direction, so we need to adjust the miter saw 45 degrees in the other direction and cut all of these pieces.

This is where my design may be somewhat wasteful, as we loose all of these little triangles in the process.

I like to start at one end of the long piece, and cut the first 45 degrees, then measure in 16" 1/8 (just to be safe) then next cut the 20" 1/8, then 16" 1/8 and then the final 20" 1/8. Once you have all of the sides cut, get out your canvas and try to line it up with the pieces seeing if you need to shave off anything from the lengths, as I learned the hard way, some canvases are not exactly the size they say they are, so this is where you want to double check before gluing.

Once the size fits, we can move onto gluing and clamping!
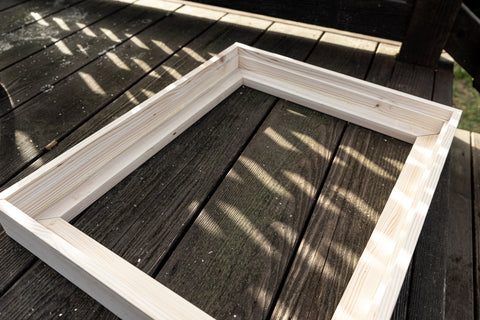
Step 5: Put it Together
Okay, we're almost there, I promise! Next up, I use a combination of two neat techniques to make the strongest, tightest joints I have found. Lay down your frame lengths in sequence - 16 - 20 - 16 - 20. Get out your masking tape, and butt the ends of each length right up against each other as seen below, and add a length of tap to keep them together.


Press that tape on well onto each of the three joints, then roll the line 90 degrees, so the tap faces down to the floor. You will then see the joints, and add a good amount of glue and spread with your finger to cover the entire surface.


I like to do one joint at a time, then fold them into each other. Do this until your frame closes, and then add a piece of tape and glue to the final joint at the end.


This tape our first line of contact for securing the framing joints, and it actually does a really good job with just the tape. You will want to double check that the joints all look good on the face at this point, with no gaps or misalignment. I like to pop in my artwork throughout all of these steps. just ensuring things haven't moved around, and that we will have a professional frame for our fine art or printed canvas. Once that looks all good get out your ratchet strap and we will secure around the frame gently, but strongly for a secure joint.

Make sure there are no folds or twists in the strap. You want to make sure the strap is centred on the corners so that there is even pressure along each corner. Once again, before you tighten here, ensure there is no gaps anywhere.
Next we wait! Let is dry for the amount of time noted on the bottle of glue.
Step 6: Finishing Touches.
Last few steps! For bigger frames, I like to add finishing nails into the joints for extra strength. If you had a nail gun this would be best but I do not, so I use a hammer and a small needle nose tap to get the nails in deep. I linked the nails and the hammer accessory in the supplies list above. With this method you do have to fill the holes with wood fill, so make sure you get something that can be stained and matches the colour of your wood. For smaller frames, the glue seems to hold really well so I don't use anything else. If you want extra security there are a number of other joining methods out there and special hammer in pieces you can get like you see on the back of cheap frames from wal-mart, but im happy with 2000 lbs strength glue!
Once all of the structural work is done you can sand with the electric sander, then with 120, and 320 grit paper, until you have a smooth fine finish. If you are using soft wood, you will want to use a wood conditioner before staining. You can also paint or leave the frames raw, whatever your heart desires! I like to use a natural stain after the wood conditioner for mine, applied with a cloth.
Once that is all done grab the canvas and place it into that snug bed you have made it, get out your drill and preset a hole from the back. Then screw in two spots to hold the canvas into place.
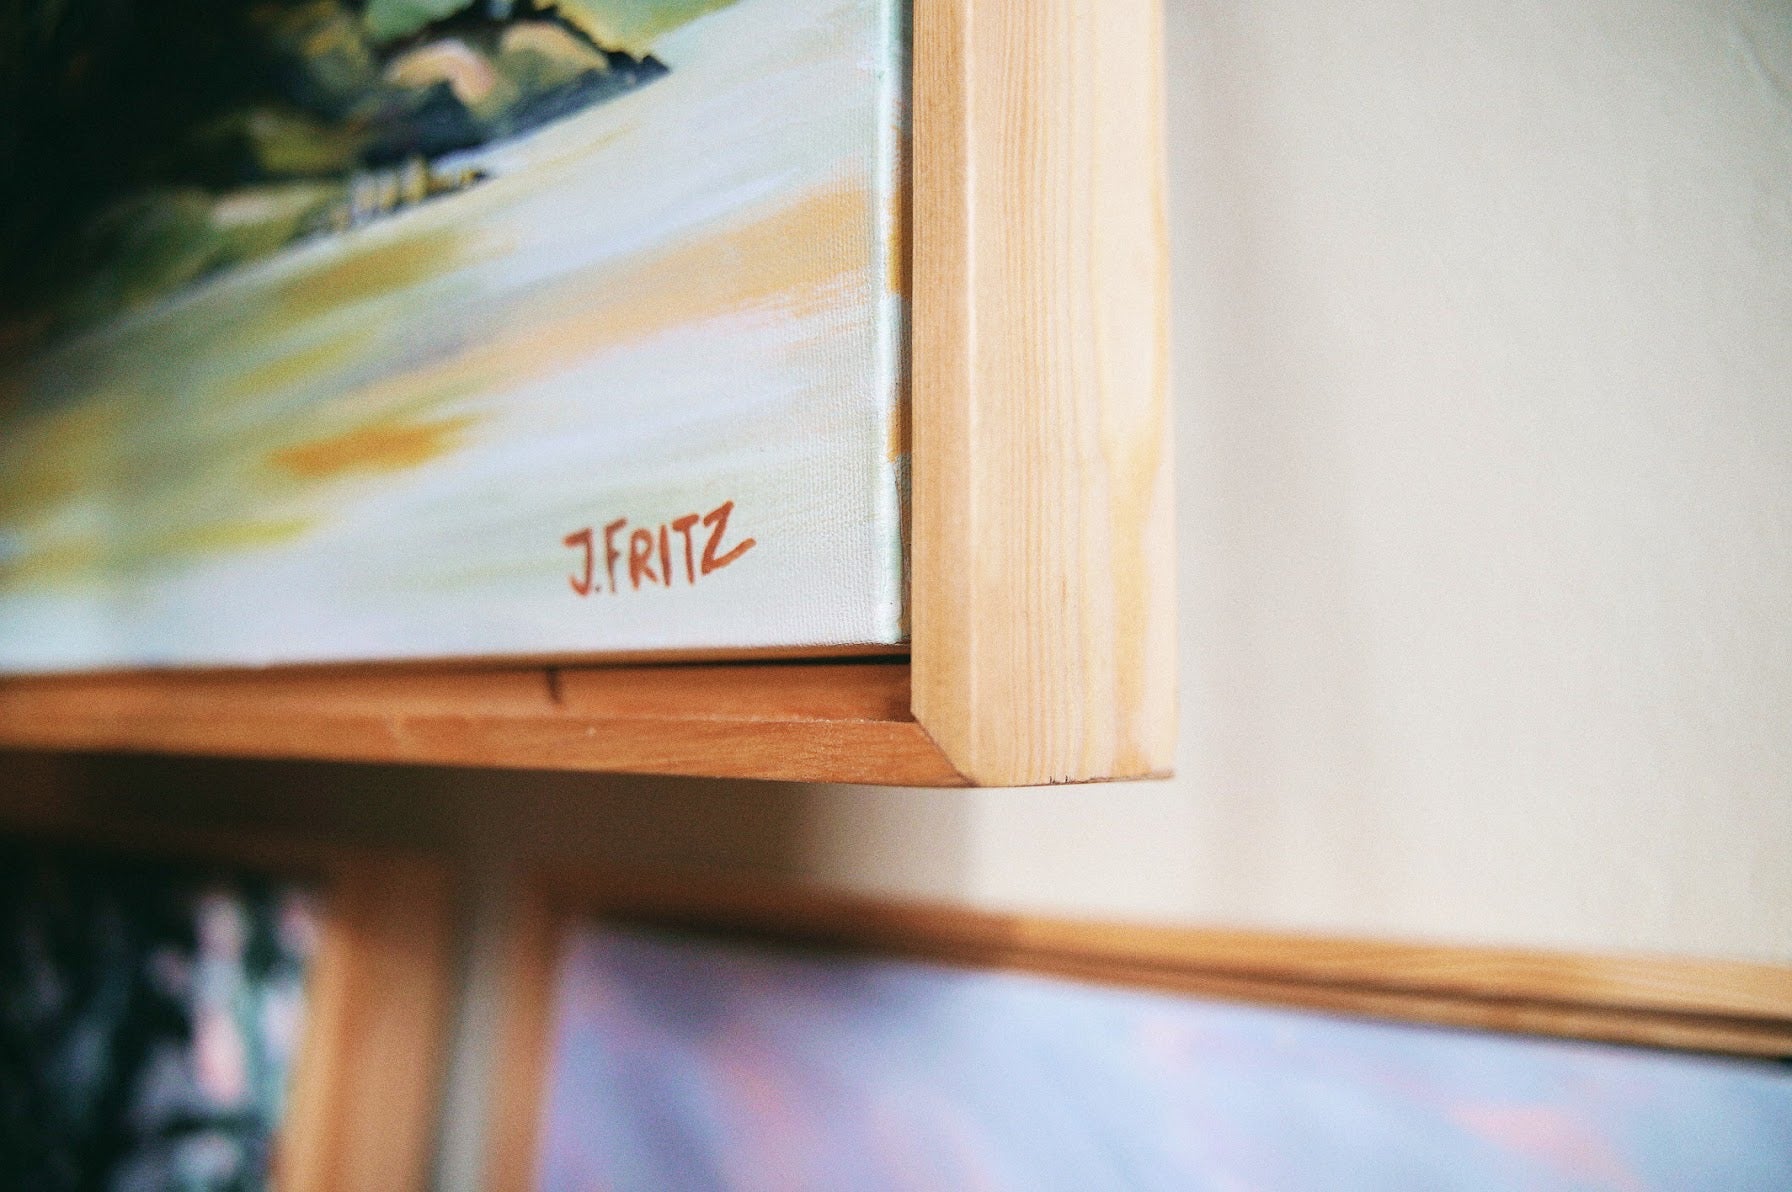
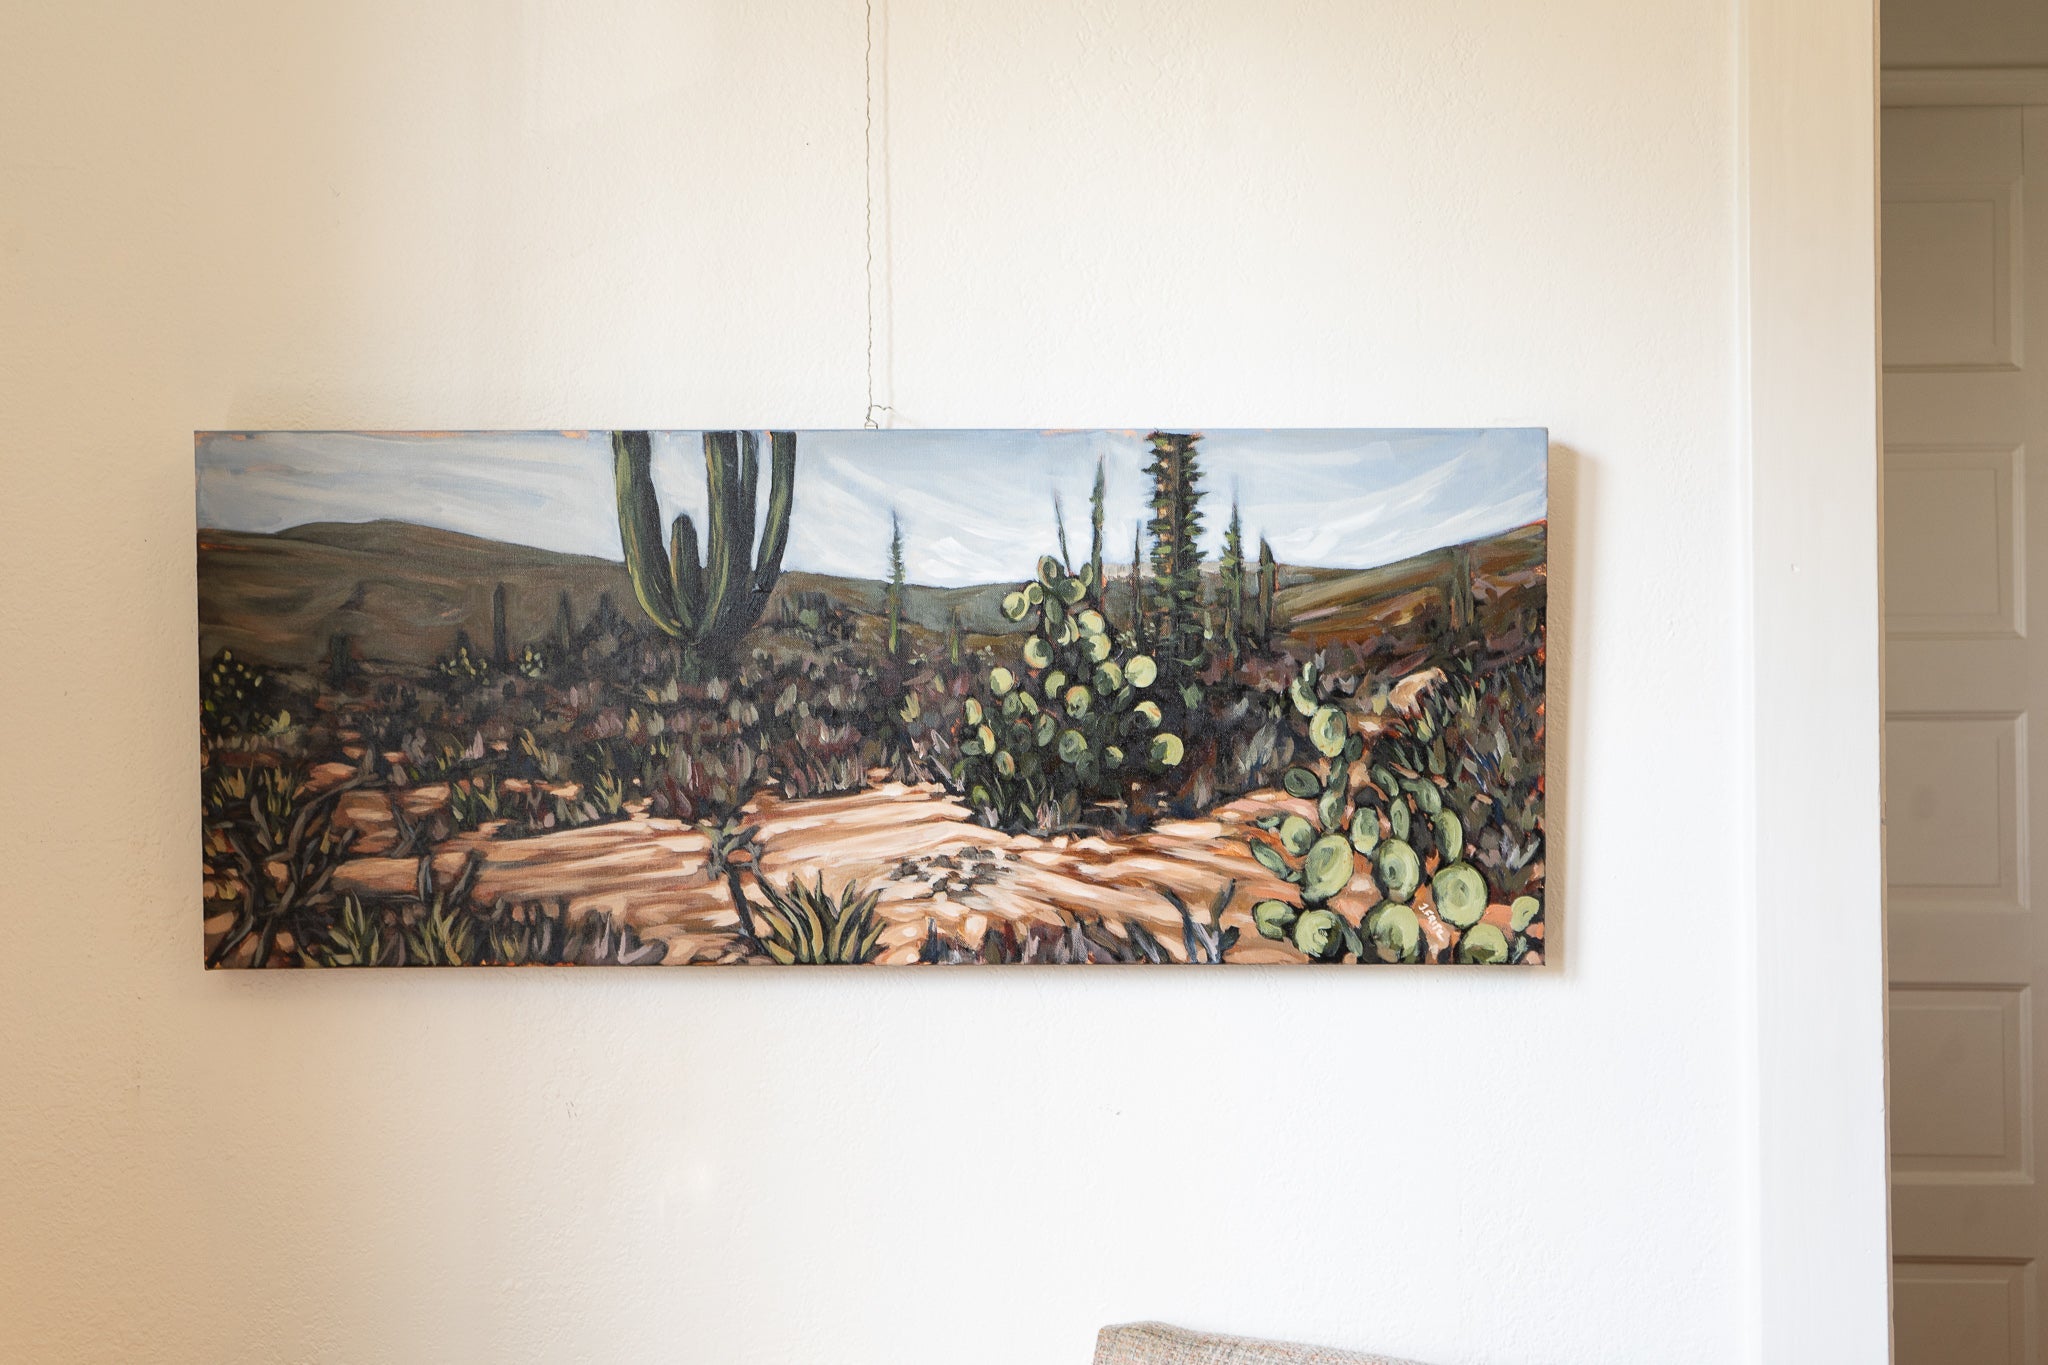
I love this method of framing for my clients and for my own original fine art on canvas. It does require a good amount of labour time, but the cost of materials is quite low and everything except the wood can be used for future wood working projects for your fine art. Here are a couple of my finished frames, with some of my original artwork included.


If you have any questions or would like to get in touch please feel free to email me at info@jfritzart.com and join our newsletter for more great tutorials and information on new releases from my studio.
Jordan's new 'Ascent' Series will feature new frames and will be available April 2, 2021.
Jordan Fritz

Comments
Very well done instructions, thanks a bunch. Will try it soon.
Thank you for sharing in the collective so I could find this!!